
Garden Cake with Basket, Tomato, and Strawberry Making Tutorials
Do you have a big brother?
I do. And as much as I’ve tried to hide it for most of my life, (it’s just a kid sister kinda thing, I think) I’ve always looked up to him. (Shhhhhh…. don’t tell.)
See, my brother, Christian, is the fun kind. In our house, growing up, we used to have family dinners together every night. You know.. the no cell-phone allowed (uhh… ’cause there WEREN’T any back then) and no TV on (’cause what was there to watch ANYWAY) kind? And I’ll never forget how my brother used to tell jokes and funny stories every night, keeping all of us (my parents, my little sister and me) in stitches throughout the entire meal.

And even though he liked to practice his American Self Defense moves on me every now and then… and even though he had ridiculously good aim whilst throwing a random snowball in my direction here and there… and EVEN though I used to almost pee my pants, running for my life from him, being chased around the dining room table while my parents were out grocery shopping for the evening (wull, ok… maaaaaaybe I was gifted in the areas of “instigation” and “intentional annoyance”)… I STILL thought he was IT, ya know?
Still do.
My brother is one of the kindest, humblest, selfless people I know. And he’s always had a heart for sticking up for and taking care of the “underdog” in this life.
I’ll never forget the day he came home FIGHTING mad when one of the “popular” jerks (sorry, but this guy sorto’ deserves it) at school picked on and physically hurt one of the special needs kids my brother was friends with who had worked up the courage to try out for the baseball team. I thought my brother was gonna LOSE it on the guy. (And I won’t lie… I might have been ok with that for just a second or two.)

After high school, my brother worked for Autistic Services, watching over special needs people who lived in group homes. He was one of the few and far between who actually cared about these guys… who was INTO helping them and making their lives just a little more comfortable.
And then he went on to become a nurse. (Personally, I think he’s addicted to helping people.) In fact, he’s been a psych nurse for a while now, and he’s just recently started a website, holisticpsychnurse.com, and Facebook page, Holistic Psych Nurse, blogging about holistic therapies which can complement modern mental health treatment. (Told you he’s addicted.)
He’s one o’ the good guys. Always has been. Always will be. And I love him.
SO much.
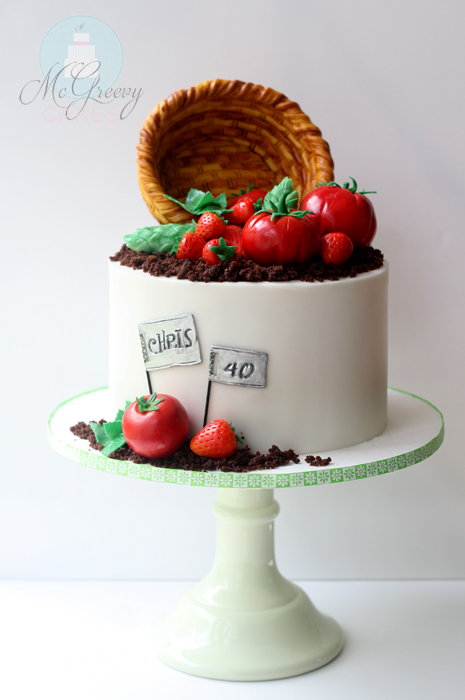
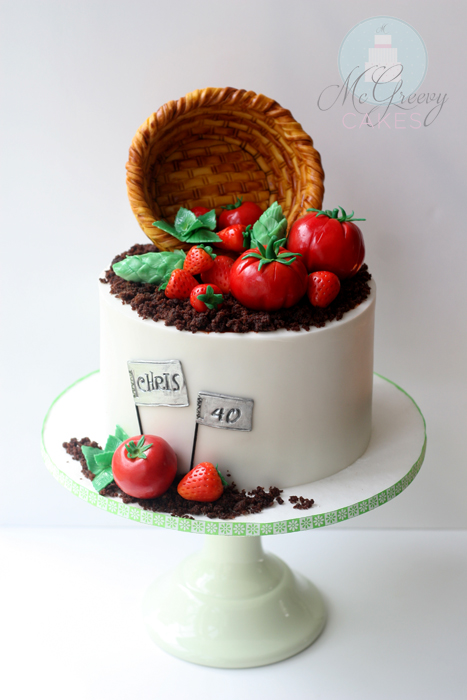
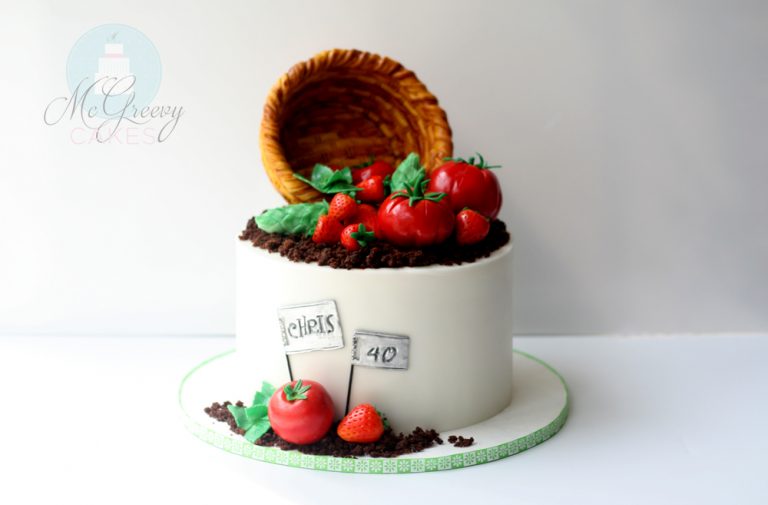
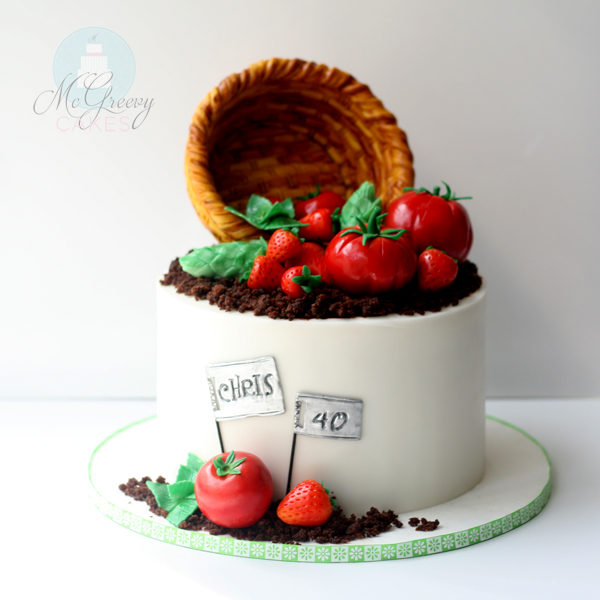
So I made him a cake I knew he’d be into on his 40th birthday. Like I said, he’s not flashy, and he can’t STAND it when too much attention is turned to him… so I kept it simple. He loves his garden… and he grew tomatoes, strawberries, hops (he’s particularly proud of those, I think) and lemon balm this year, so I thought he might like to see the “fruits” of his labor (or a little bit sweeter version of them, anyway) up on top of his cake.
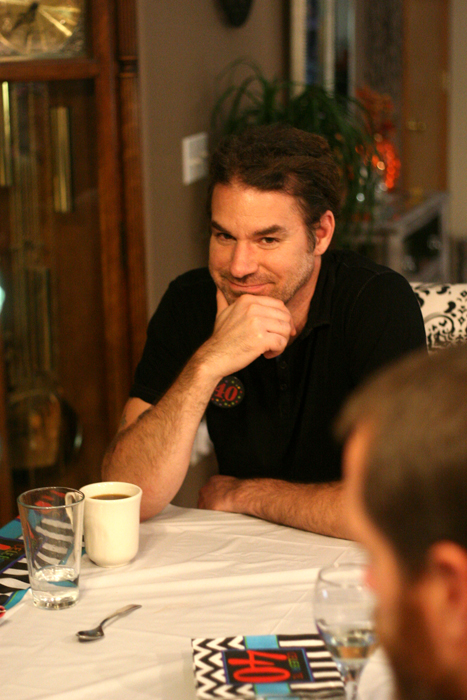
He did. He smiled BIG when he saw it… and it’s really quite scary how much I like my big brother’s smile. Something about it just makes me melt.
Always has… always will. Xx
The making of this cake…
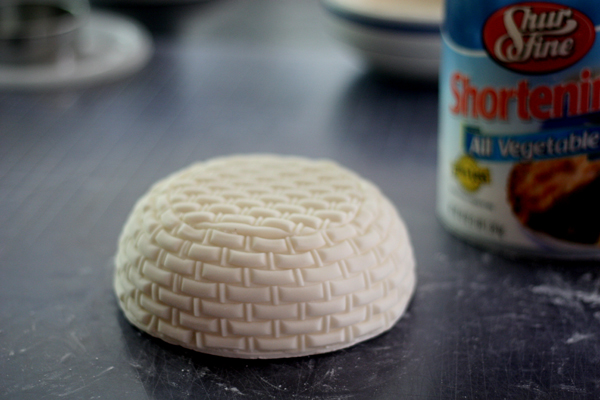
In order to make a sturdy basket that will “stand” on top of the cake, you need to start with a pretty firm structure.
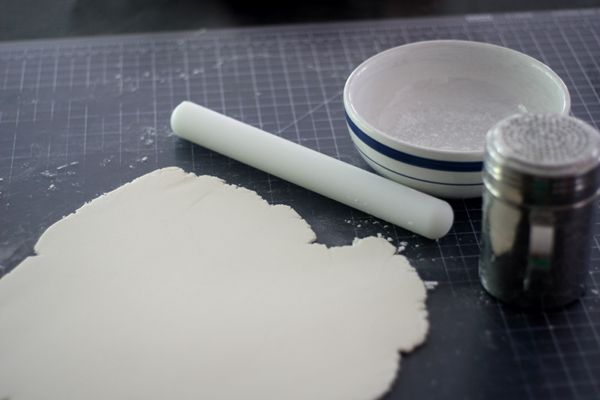
So I made the structure for this basket out of pastillage. It’s very similar to gumpaste (I order it in powder form and then follow the directions on the package and add water to make a quick batch) but dries even firmer and faster… so it’s good to use for those projects that you NEED to dry super hard.
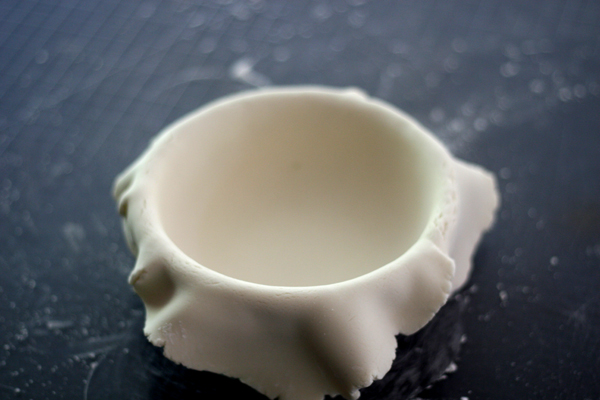
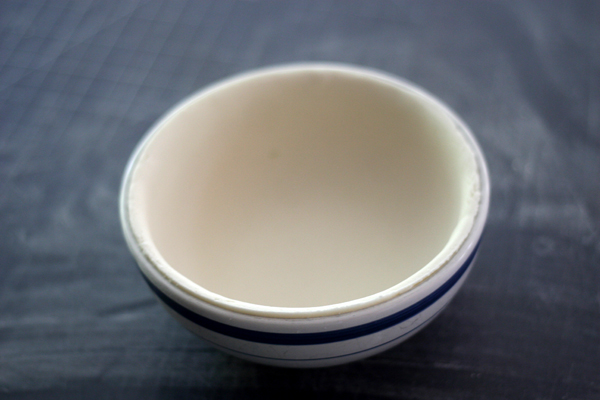
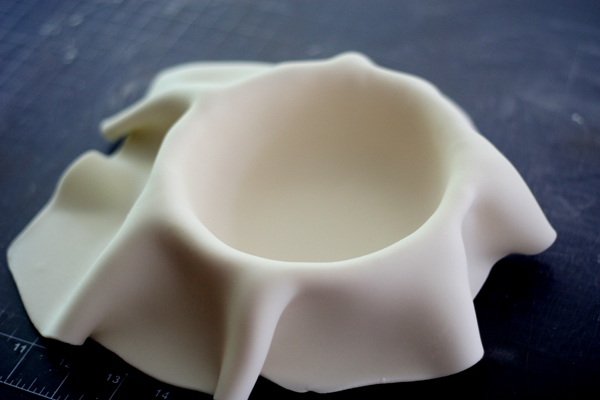
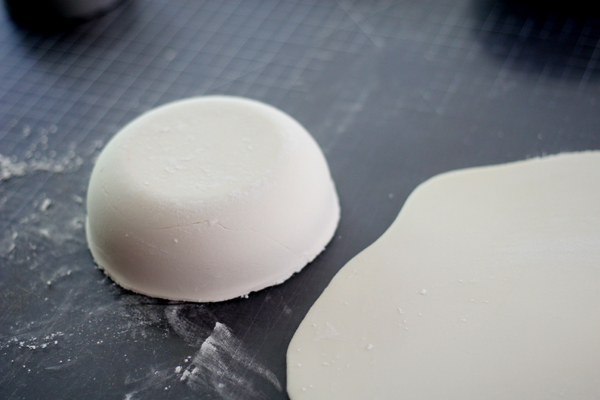
To create the bowl structure, I rolled out the pastillage and gently formed it around a real, ceramic bowl.
Make sure you give both the bowl and the pastillage a good coat of powdered sugar first so it doesn’t stick, and then place the pastillage over the inside of the bowl and GENTLY smooth down into it, making sure to work out any pleats or creases as you go.
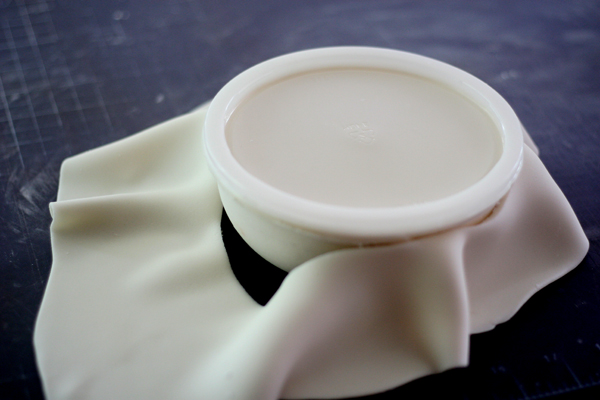
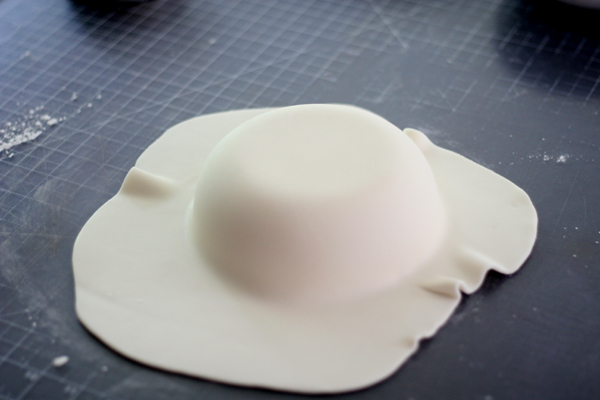
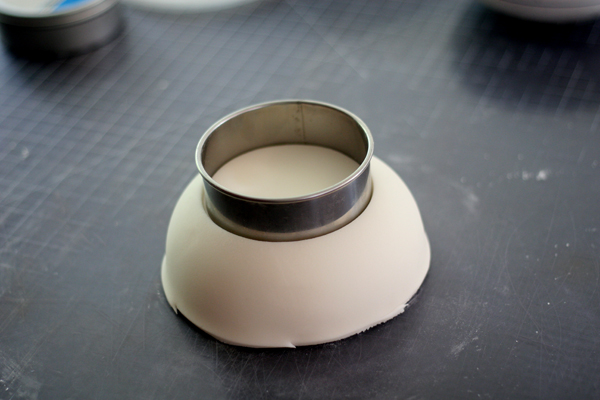
Then, find something in your kitchen that’s round and about the same size as the opening of your bowl. (I used a tupperware lid.)
Place it over top of the opening, and gently cut around it to get a nice even edge.
(Don’t fuss over the edge too much though as it will eventually be covered.)
Make sure the pastillage moves around in the bowl when you twist it (we don’t want it to stick) and leave it in the bowl to dry for at least a whole day, more if you can spare it.
Once it’s dry, it’s time to “dress it up”.
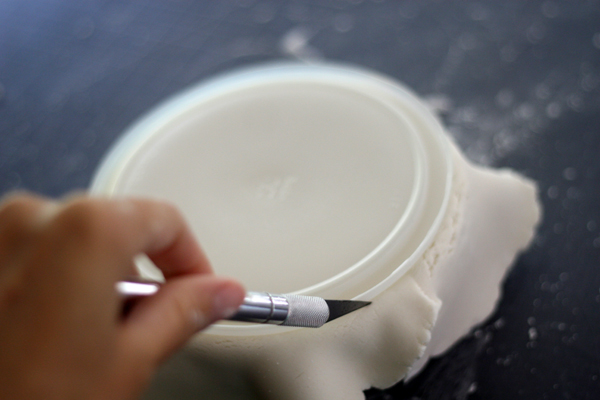
Roll out a large piece of fondant and do the same steps as you did with the pastillage, only this time, use the pastillage bowl as your guide.
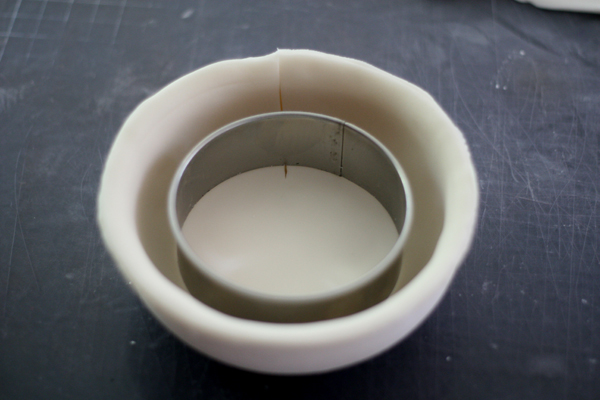
Once you’ve smoothed the fondant into the pastillage bowl, use a round cutter to GENTLY cut out a circle in the bottom of the fondant (Do NOT cut through the pastillage… be GENTLE) and GENTLY cut a slit from the bottom circle up the side of the fondant. AGAIN, do NOT cut through the pastillage!
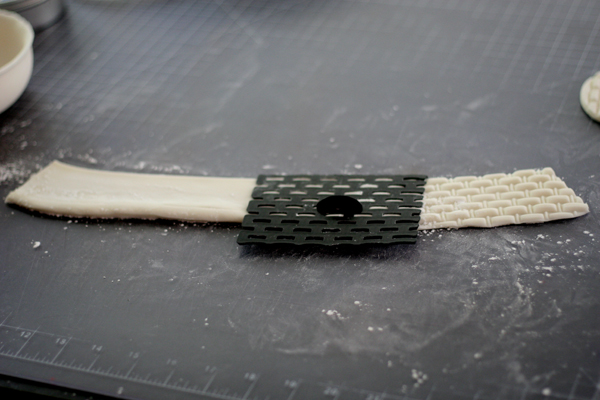
Take the two separate pieces out and use a basket weave impression mat on them. I used a basketweave embosser by Patchwork Cutters, here.

I then placed them back into the original ceramic bowl to hang out (and keep their shape) while I worked on the outside of the bowl.
Ok, now we need to make the bottom weave pattern of the bowl.
Flip the pastillage bowl over and cover it with another large piece of rolled out fondant.
Cut around the bottom edge, and then use the round cutter again to GENTLY cut through the fondant at the top. (NOT cutting through the pastillage.)
And again, make a slit GENTLY through the fondant from the circle down one side. (NOT cutting through the pastillage.)
Remove both pieces, use the basketweave embosser on them as you did the inside pieces,
and then rub the underside of them with shortening, covering the entirety of both pieces, and adhere them back onto the pastillage bowl.
Now, gently flip the bowl over and do the same with the two inside pieces.
It should resemble a basket now! We just need to make the top edge and paint it!
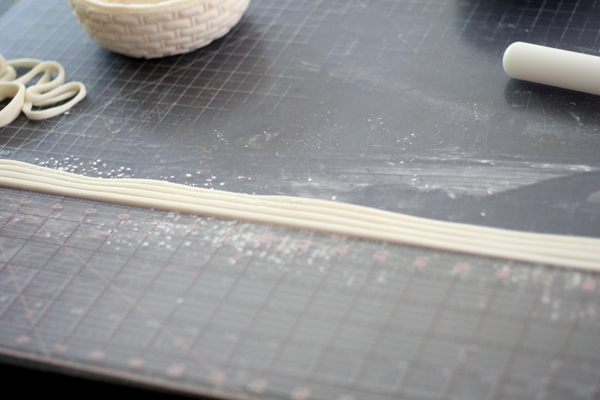
Roll out a long piece of fondant and cut it into several skinny strips. I made about three even strips.
I used my quilting ruler, which is pretty much my BFF these days. It makes cutting large pieces of ANYTHING such a breeze!
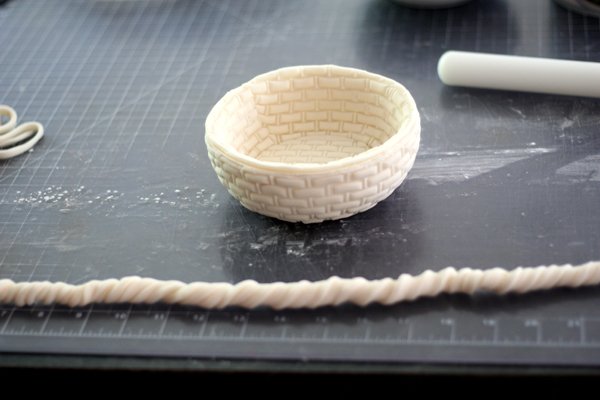
Now use a small paintbrush and just swipe a little bit of water on the top of the strips while they’re all lined up next to each other.
Grab one end of all of the strips and start twisting them together until the entire rope (which you hopefully measured to make sure it’s long enough) is twisted.
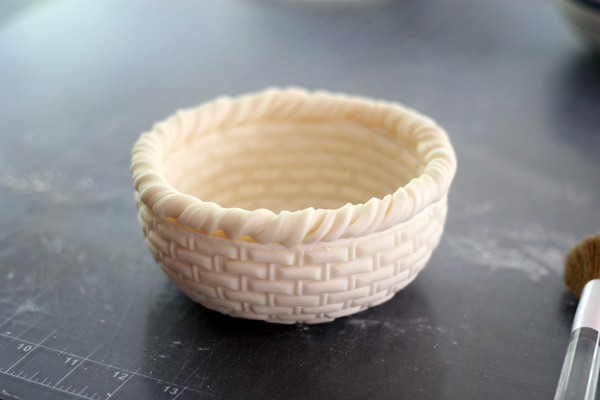
Rub a little bit of water on the top edge of the basket and place your twisted rope on top!
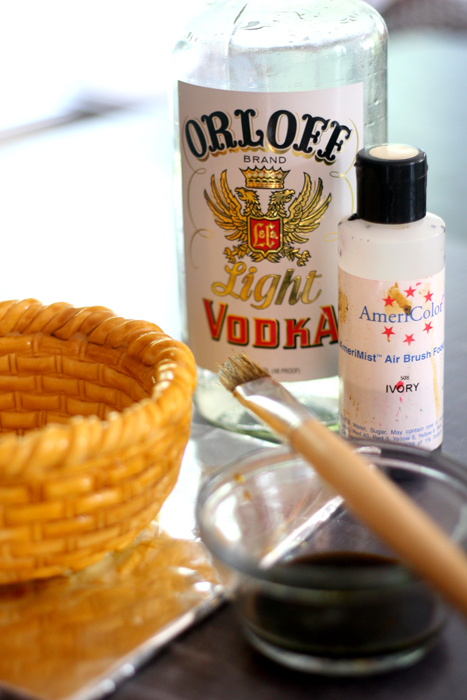
To paint the basket, I stared with some ivory airbrush color thinned with vodka to make it more of a “wash”. (Don’t use LIGHT vodka if you can help it, like I did. The more alcohol content, the better for painting and drying.)
Brush it on the entire surface. (You’ll need to wait to get the very bottom until the top part is dry. I just swiped the bottom once I had the basket attached to the cake.)
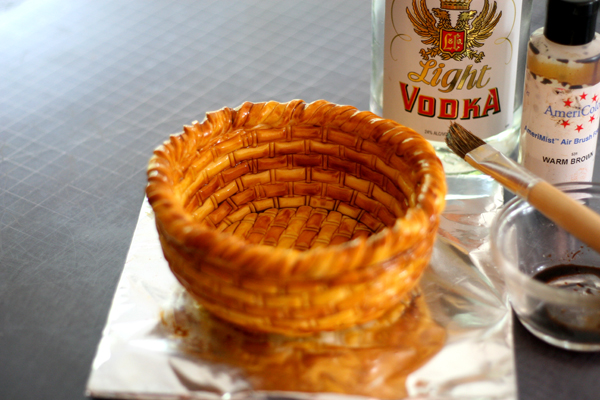
Next, make a wash the same way only using warm brown airbrush color, and paint it onto about every other row and a bit on the top edge to give it some variation.

Give it time to dry… and voila! You’ve got yourself a respectable, edible basket.
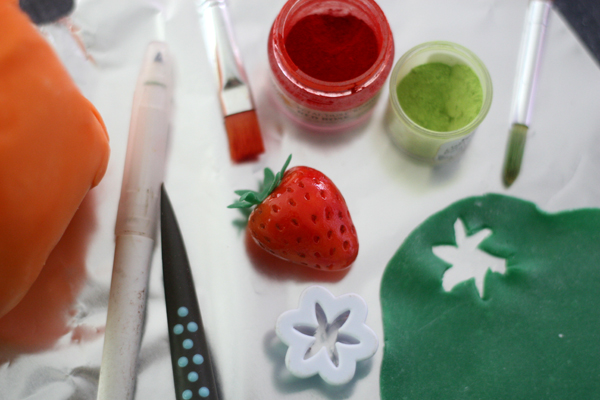
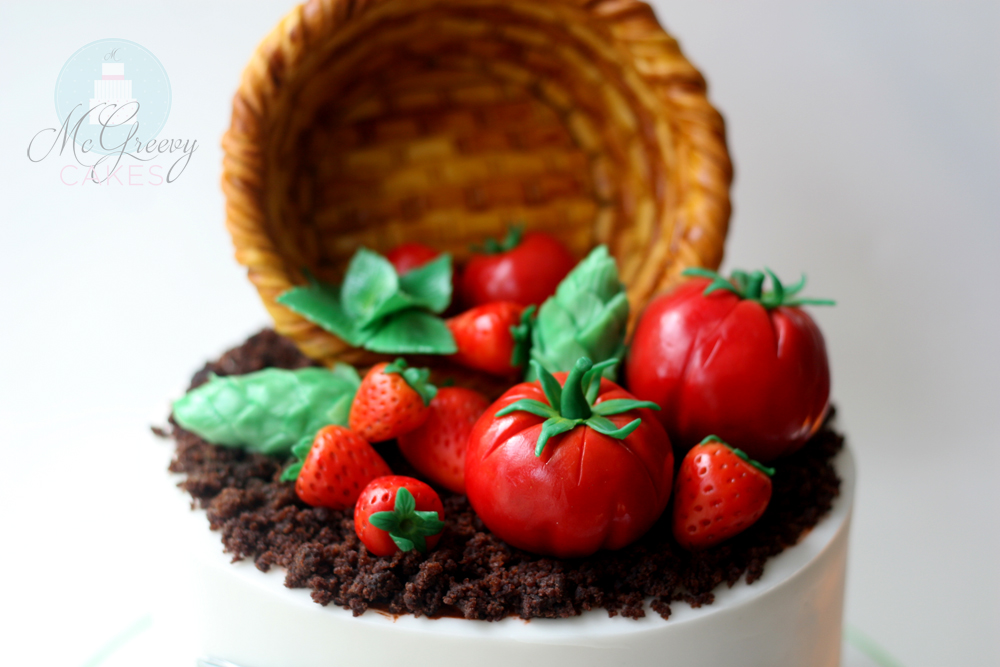
I used orange modeling chocolate, red petal dust, my pointed tip mini sugar shaper (to make the seeds… get a 10% discount on sugar shapers in my blog post, here), my brown food coloring pen (to dab into the seed holes) and some confectioner’s glaze (for a shiny finish) to make the strawberries.
I also used my mini daisy cutter to make the calyx, dusting it with some lime green petal dust.
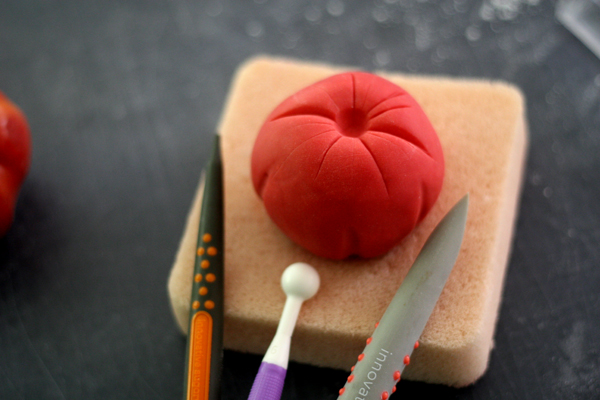
I used my angle chisel tip sugar shaper to make the creases in my tomatoes, my rounded tip sugar shaper to make the dents in the bottom of the tomatoes, and my ball tool to make the stem center. (I rounded out that center with my fingers a bit which you can see in the next picture.)
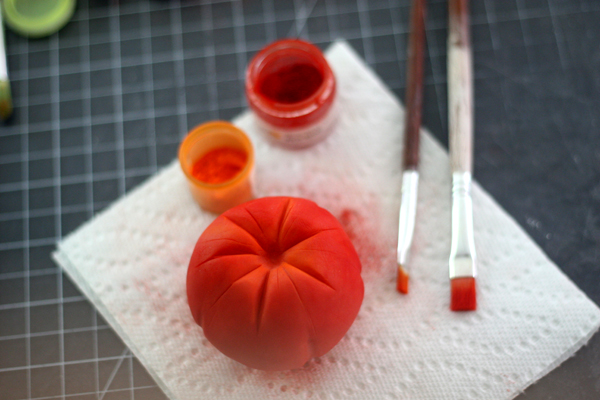
And then I dusted it with orange and red petal dusts.
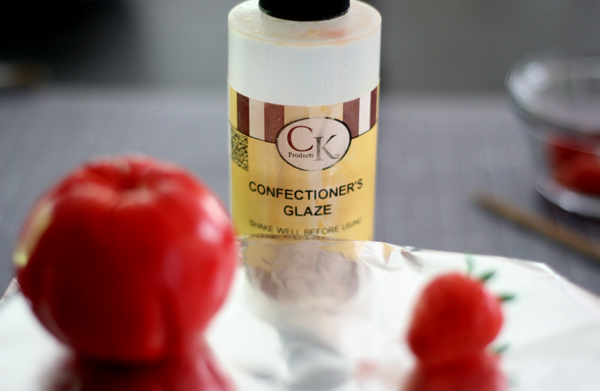
I brushed the tomatoes with some confectioner’s glaze, as well.
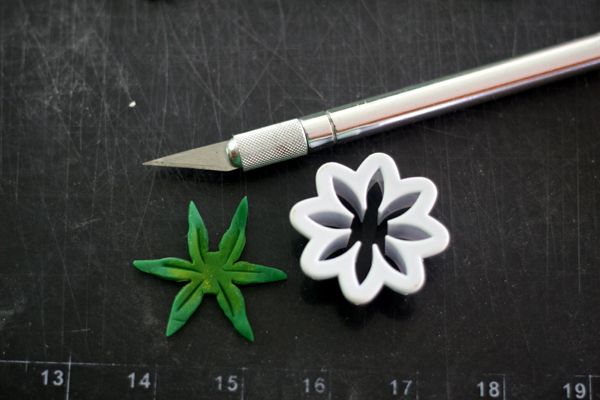
I used one of the larger cutters in the daisy set and cut off two of the petals to form the calyx for the tomatoes.
And I dusted that with lime green petal dust, as well.
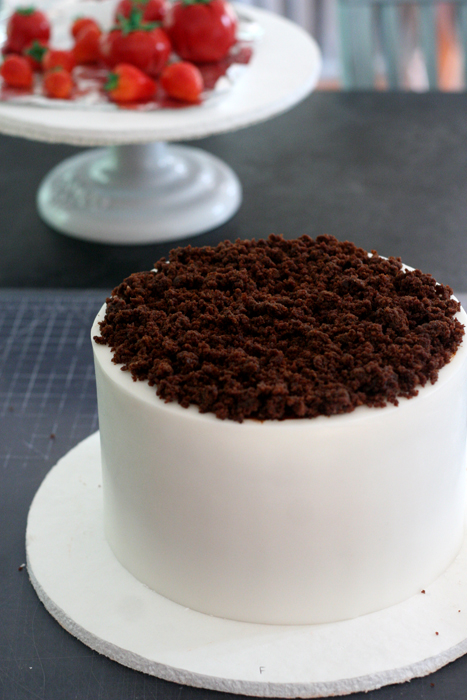
I crumbled up some left over chocolate cake scraps and spread it over top of the cake to make the “dirt”.

And to attach the basket, I used two wooden dowels (which I painted the same color as the basket) pushed down into the cake but left sticking up a bit for the basket to lean against.
Warning… use taller dowels for this. Mine were too short and started digging into my basket a bit. I ended up placing one of the tomatoes behind the basket for added support.
Add your sweet produce, and you’re finished!!
More Articles For You


Shawna McGreevy
I love that our Cakeheads members enjoy hanging out together online, learning from and sharing with one another each day.
Being a part of this group is truly one of the most amazing and enjoyable ways to learn the art of cake decoration!
Come join the Cakeheads family...we'd be honored to have you with us. Xx
Shawna has been featured in several different magazines such as Cake Masters and American Cake Decorating Magazine and has been a featured artist at the Cake, Bake and Sweets Show, Australia and the Cake Fair in Florida. She’s also taught cake classes around the world, was nominated for the Cake Masters Cake Hero award and has been chosen as one of the top ten cake artists in the United States, 2017 by Cake Masters Magazine.


Top Ten Cake Artist, USA - 2017