
The Making of A Pirate Ship Cake (A mini tutorial)
I’m just gonna say it. Straight up. This is the FIRST year (2014) I’m making each of my children a cake for their birthday!! (My son got one the first year I started making cakes… but my other kiddos got the shaft that year. *Hanging my head in shame.*)

Pathetic? Yes. Unfair? Yes. But in my weak, shallow defense… there simply was not enough time. I have four nieces who we celebrate with for EVERY birthday, and I just couldn’t make one for each of MY kiddos, and not one for each of my little beauty nieces! And with the amount of customers I was taking on… well, I just couldn’t make it work.
Yell, spit… you can even curse at me (just not out loud, and then no one will know… except GOD of course, but hey, that’s between you and Him ) for being such a negligent mom, I’m ready for it. But rest assured, the guilt has been punishment enough.
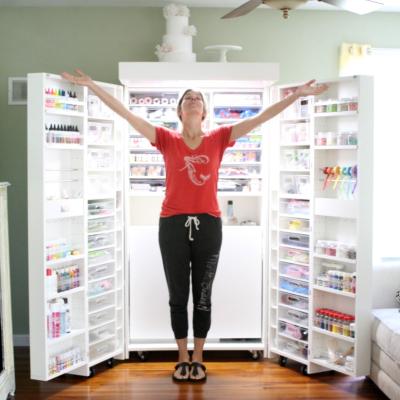
Well, times ARE a changin’. There have been some crazy, fun opportunities goin’ on ’round here concerning this little cake company, and because of it, we’re taking a bit of a new direction.
We are officially not taking on any new customers, and will instead be focusing on teaching and filming tutorials, writing books, maybe opening up a few time slots for private, online tutoring… and, of course, donating some cakes to some special little ones who could use a smile, along the way. (I’m really kinda sorta excited about this!)
And because of this new direction, I’ve decided it’s about time my kiddos got to have a little fun, too.
So put away your tomatoes, swallow that spit, and change your cursing to songs of praise (hee hee, *snort*) ’cause THIS mama’s ’bout to BRING it to her babies, yo!
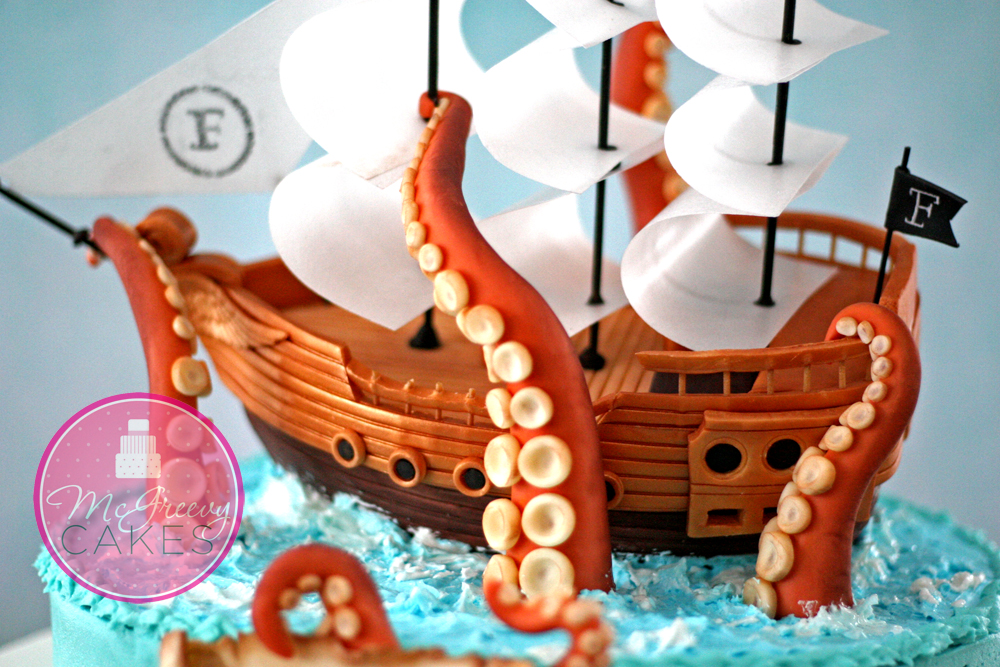
And to kick it off, mah lil’ boy got the pirate ship cake being attacked by a giant squid that he’d been talking about! (Well, ok, MAYBE I suggested that the ship be under attack… call me crazy but I just had this nagging little hunch that he might find that kinda cool. Low and behold, he did. Who knew mom had ANY idea what “cool” could entail?

Right? SERiously. Duh?)
So, I’m hopefully redeeming myself… one giant tentacle at a time. 😉
So here’re (huh! didn’t even know that was, like, a REAL contraction… but I digress) a few progress shots of the making of the “ship under attack” topper.
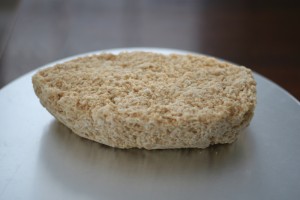
I decided to go with rice krispie treats as my base, modeling chocolate for the details, and royal icing for the water… all on a cardboard cake card to make it easy to place on top of support straws that were cut and inserted down into the cake below, once it was time.
I first manipulated my rice krispie treats into the base shape of a ship with a flat bottom, somewhat pointy front, flat back and curved, symmetrical sides.
We also have a link to some templates for the separate pieces that Thomas put together for me afterwards, that we used when I taught this class over in Ireland, if you'd like to print them out and use them and your guides!
Don't worry about making it too high. Just make it about half as high as what you want your final ship to be (mine was about 2"). We'll be using modeling chocolate to build the rest of the height.
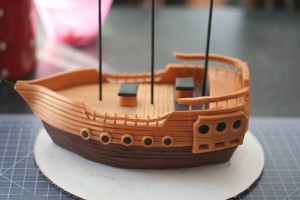
I measured my shape and then rolled and cut brown pieces for the sides and back of the boat, attaching them and trimming off any excess. (You can just roll one long piece that wraps around the back and meets in the front if you'd rather.)
Make the side sections long enough to connect them in the front (the bow) by just sandwiching the two pieces together. Glue them with some water, and then cut off (at a slant) the excess, so they form a bit of a point.
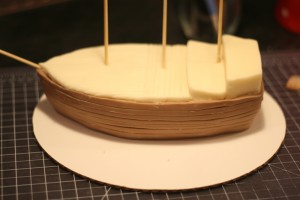
I also cut some lighter pieces for the floorboards of the ship, just trimming along the edges to get the right shape, adding a few extra rectangular chunks at the back to form the top of the cabin and such.
I scored lines into the modeling chocolate (with my mini roller tool that comes with a Wilton fondant tool set) onto the sides of the ship and floor boards so it would look a bit like wooden slats, and then I painted the back sections and the sides an even darker brown (or you could just start out with that color modeling chocolate if you'd rather).
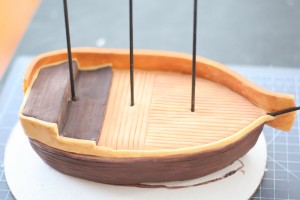
I was flying by the seat of my pants here, so I at first added a little edge around the sides and back which you can see in the photo above, but that wasn't really needed (so you can skip that part).
I then rolled out one looooooooong strip to wrap around the whole top section of the ship and meet in the front, where I again sandwiched the two ends and cut them at an angle. (Using just enough water as my glue that I'd rubbed onto the inside of the modeling chocolate so it got nice and sticky and adhered well.)
And then I painted it with a copper luster dust mixed with Everclear (or you could use Edible Art Paints in copper!) to get a little bit of a shiny, classy finish.
Then I started adding the details.
To make the windows, I used set of circle cutters to cut little circles of black modeling chocolate and then used the same size circle cutter plus one slightly larger to make the thin trim circles for around the black circles.
I hand cut the shape for the back section of the cabin windows, inserting more black circles into the holes to create the windows, and I added a couple of seat-like blocks in the center of the ship with just squares/rectangles of modeling chocolate.
Oh, and I added another layer of modeling chocolate over the back section of the cabin and painted it the copper color.
Just 'cause I thought it looked better.
I also added a little rectangular piece of modeling chocolate directly center back of the ship, between the rails, so that the rails would have something solid to be attached to.
For the rails, I used little pieces of dry, uncooked, whole wheat spaghetti noodles, stuck into the modeling chocolate, with modeling chocolate strips cut and pushed CAREFULLY and gently down on top of them so that they sunk slightly into the noodles (on the back, though I stuck them all the way through on the sides).
You'll notice that you'll have to cut (carefully and with a SHARP scalpel or Exacto knife) sections out of both sides of the "wood" on the boat to insert the rail sections in.
Take your time and be GENTLE. It's tedious to get them all straight and as perfect as possible, but worth it for that rail detail, I think!

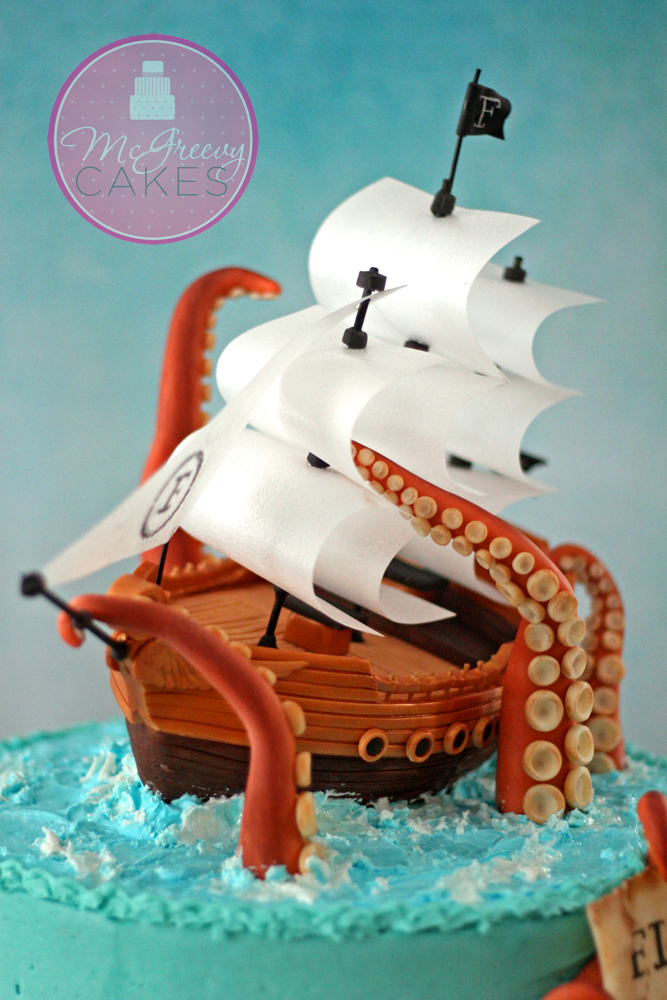
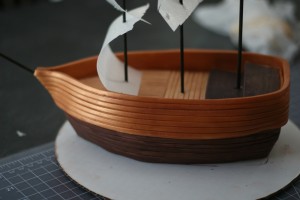
I used four wooden skewers (that were painted black with airbrush food coloring, as it dries quickly) as my poles to hold up the sails, with one sticking out of the front at an angle.
The sails are made with wafer paper, which you simply MUST HAVE AROUND THE HOUSE AND PLAY WITH SO THAT YOU CAN USE IT ON YOUR CAKES TO MAKE BEAUTIFUL AND COOL DECORATIONS AND LOVE ME SO MUCH FOR MAKING YOU BUY!!!
(Shhhhhhh… why you shouting? Oh wait, that was me.)
Here's a PDF file of templates for making the sails to correspond with the ship templates (up top) if you'd like to use it...
I punched two small holes for each sail, lined up with each other (centered between the top and bottom of the paper) on both ends of the paper so they could be slid over the poles,
and I used very small balls of black modeling chocolate underneath and at the top of each sail, attached to the poles with a tiny bit of water, in order to help them stay in place. (Don't get the sails wet!!)
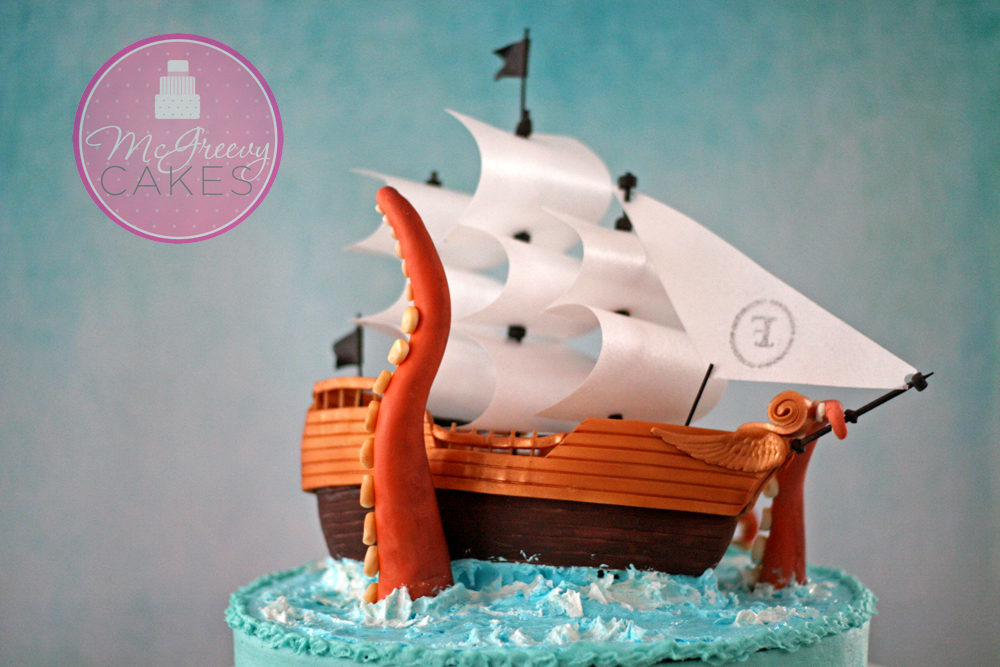
The front sail had to be custom cut into a triangle shape and strategically placed on the poles with an extra little painted black spaghetti pole (see the photo of the back of the ship) so as to stay in place and not interfere with the first main sail behind it.
I created the flags out of modeling chocolate and painted spaghetti for the pole, and attached one to the main mast with a little ring of modeling chocolate around them both.
I used a stencil and some dust to create the F on the sail.
I used a wing mold that I had to create the nautical figurehead on the front of the ship, and I rolled up some modeling chocolate to help finish the look.
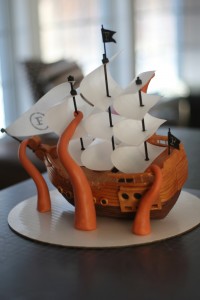
To create the tilt of the ship, I cut a wedge shape out of modeling chocolate and placed it under one side of the ship. You can attach that to the board and ship with some royal icing or melted candy melts.
The wedge will eventually be hidden by royal icing water.
To create the tentacles, I rolled logs of modeling chocolate, tapering them to a point at one end, keeping them thick at the other, and I placed them on the board reaching out to attach onto the ship as I went, wherever I thought they looked good.
The magic of modeling chocolate is that you can do something like this and it will hold it's shape and stay where you place it without waiting for it to dry like you often need to do with fondant!
Once placed, I used a little royal icing (that I would soon be using for the water) and attached them to the board.
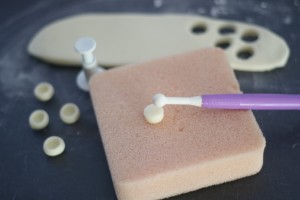
And then I cut three different sized circles out of white modeling chocolate for the suction cups, placed each one on a thick piece of foam, and used a ball tool to gently roll down into the center of them to create that "cupped" effect.
I placed them onto the tentacles with a little water (or you could use shortening, royal icing, candy melts, etc.)
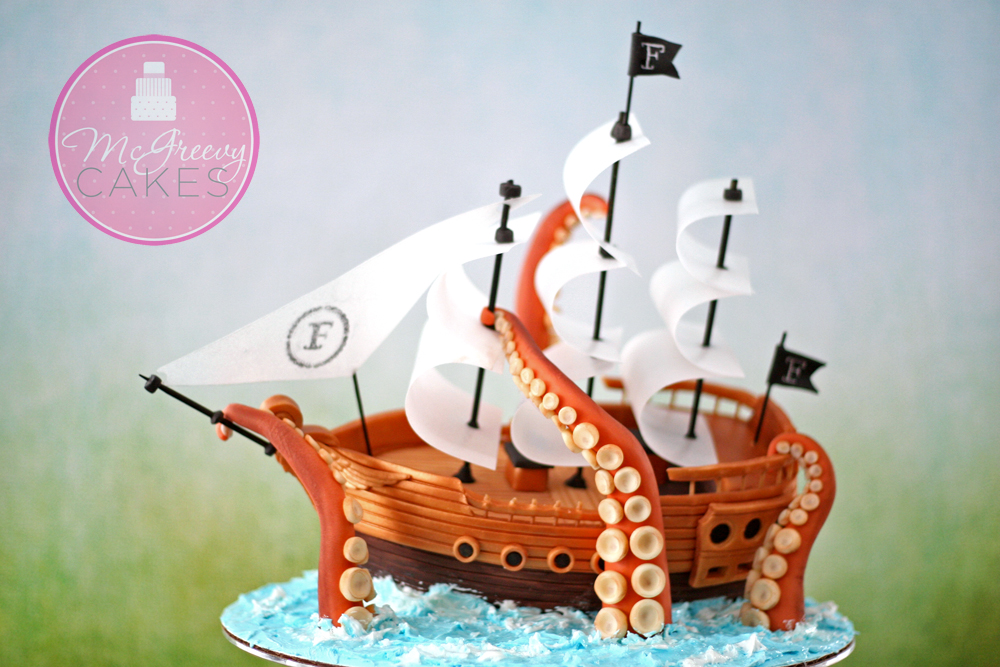
I dusted the tentacles and suction cups with a little bit of brown petal dust to create some depth.
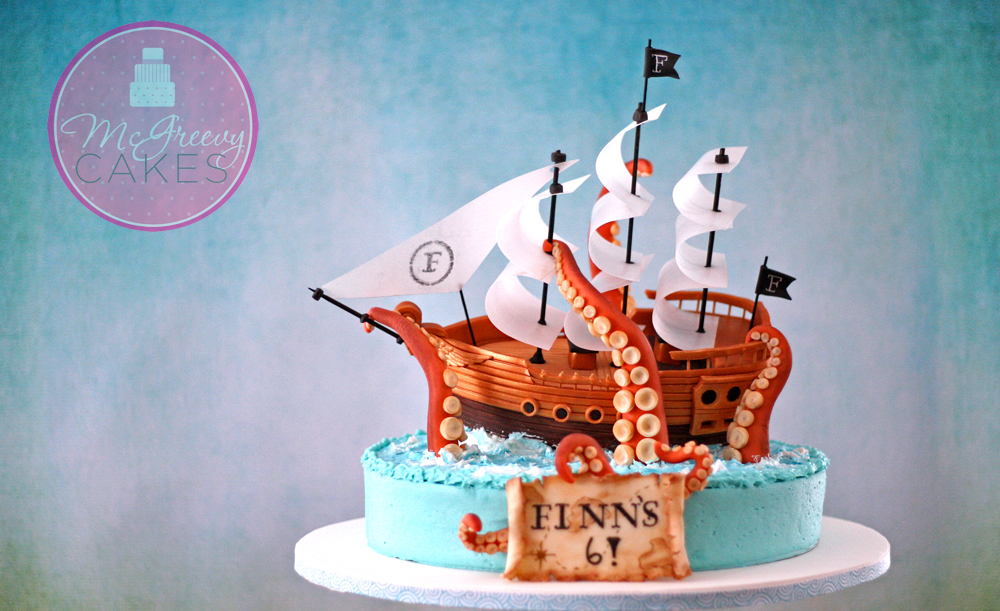
Then, I used my palette knife and some stiff royal icing to create the blue waves, with a little bit of white over top of some sections. And once dry, I brushed some confectioner's glaze over top to give them the wet look.
I have a modeling chocolate and a royal icing recipe, free, in the project center if you need them!
The topper was then ready to be placed on top of my short, 10" cake! (Which you can of course scale up however you desire.)
Make sure you put support straws into the cake first so hold up the board that the topper is on so it doesn't crush your cake!
Once placed, use a little more blue royal icing to hide the edges of the cardboard.
I made the map for Finn's name with some modeling chocolate, rolled at the ends and cut into at the edges a bit, and then dusted with some brown petal dust, having used edible markers to create the land markings and name.
I didn’t use any fondant or gumpaste on this one.
Kinda crazy, huh?
Yes, I must get you addicted to modeling chocolate, as well.
‘Cause that’s what I do. I bring you joy and life through new addictions.
You're welcome. 😉 Xx
More Articles For You

Shawna McGreevy
I love that our Cakeheads members enjoy hanging out together online, learning from and sharing with one another each day.
Being a part of this group is truly one of the most amazing and enjoyable ways to learn the art of cake decoration!
Come join the Cakeheads family...we'd be honored to have you with us. Xx
Shawna has been featured in several different magazines such as Cake Masters and American Cake Decorating Magazine and has been a featured artist at the Cake, Bake and Sweets Show, Australia and the Cake Fair in Florida. She’s also taught cake classes around the world, was nominated for the Cake Masters Cake Hero award and has been chosen as one of the top ten cake artists in the United States, 2017 by Cake Masters Magazine.


Top Ten Cake Artist, USA - 2017